Making a simple notepad UI in QT Designer
QT is a popular cross-language and cross-platform library for creating Graphical User Interfaces for personal computers and alike. It has theming and styling support, support for keyboard interaction and all common hotkeys, and most importantly, wide adoption and a large amount of tools to make working with it easier.
Today I will tell you about QT Designer, a graphical tool for creating QT-based interfaces.
Video version Link to heading
Preparation Link to heading
Installing QT Designer Link to heading
Windows Link to heading
Download and install QT executable found in official webside or install third party package like pyqt5 or pyqt6 using pip from command line that also includes it.
Then, you need to check installation path, find designer.exe file here and launch it.
Linux Link to heading
Install qt development tools package, it has different name based on distribution you are using
sudo apt install qttools5-dev-tools # QT5, Ubuntu/Mint
sudo apt install qttools6-dev-tools # QT6, Ubuntu/Mint

sudo dnf install qt5-qttools-libs-designer # QT5, Fedora
sudo dnf install qt5-qttools-libs-designer # QT6, Fedora

sudo pacman -S qt5-tools #QT5, Arch
sudo pacman -S qt6-tools #QT6, Arch

nix-shell -p libsForQt5.qt5.qttools # QT5, Nix
nix-shell -p qt6.qttools # QT6, Nix
After that, run designer command which will open Qt Designer, or make a desktop file as shortcut to launch it graphically.
Learning interface Link to heading
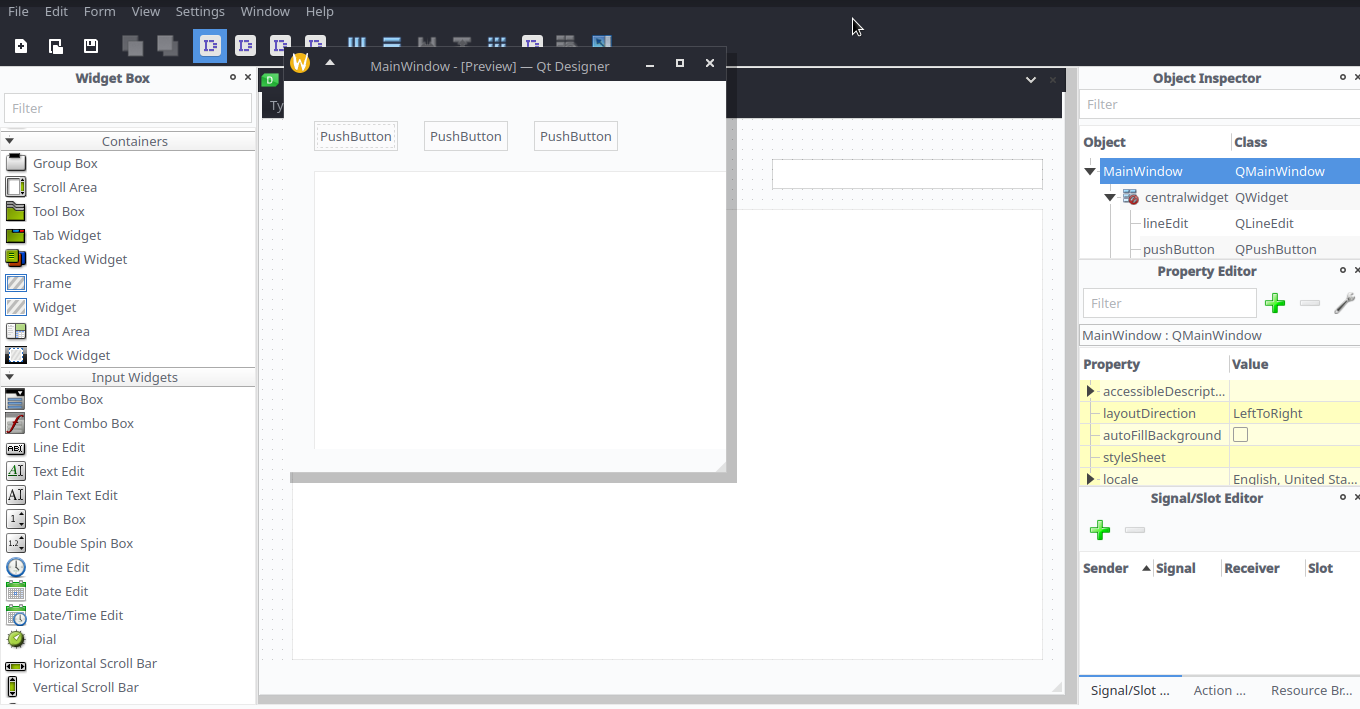
Here is the main window of QT designer. For simplicity, I highlighted the important regions on the screenshot.

- Main Workspace
- Object inspector
- Property Editor
- Signal Editor (combined with two other)
- Widget Box
- Buttons Bar
- Menu Bar
Creating a basic text editor interface Link to heading
So, we will create a simple interface for notepad, or text editor app. We will need three types of widgets.

Drag and drop Link to heading
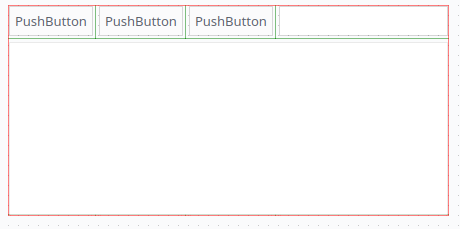
One of things that are gotten completely wrong in a lot of simmilar tutorials, is how they ask you to manually drag and drop widgets from widget box (5) into your interface (1) and position them how you want. If we try doing so, it works, but…
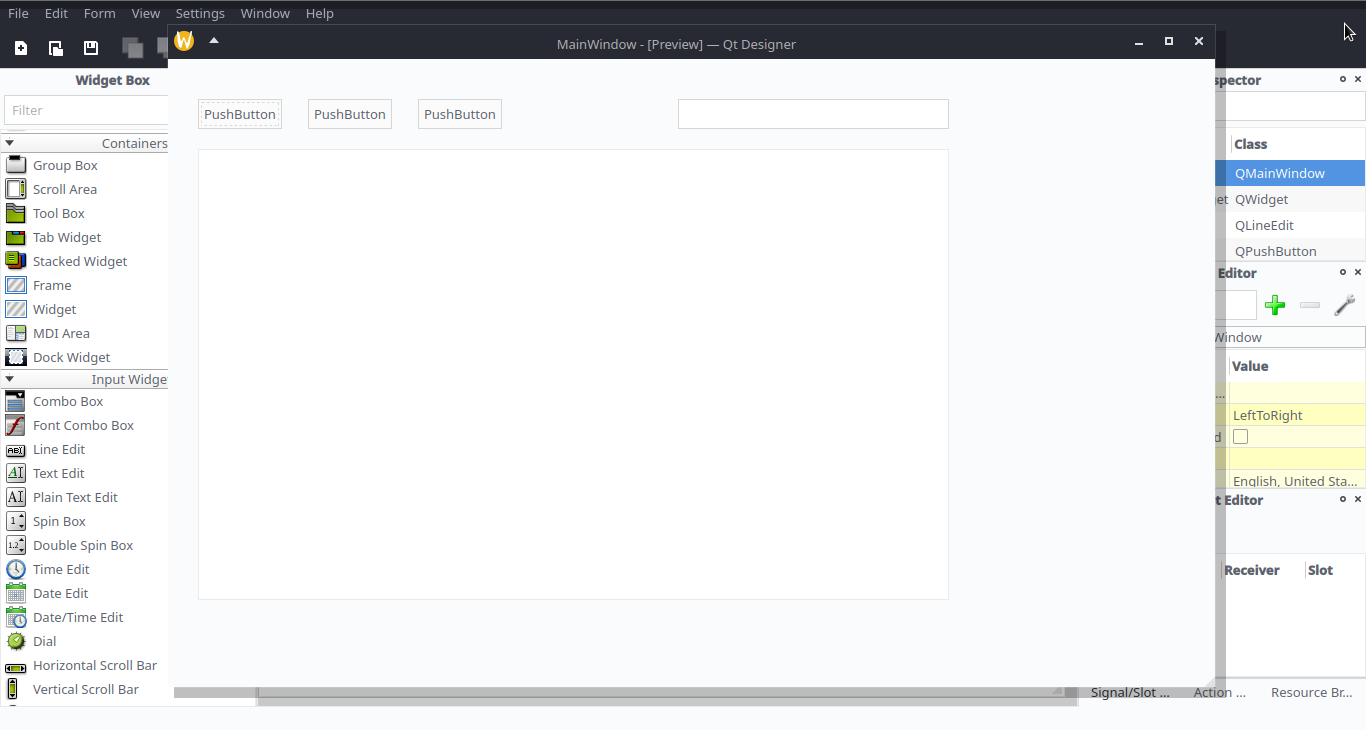
As you can see, it doesn’t scale well and may waste a lot of useful space for no reason at all.
Using layouts Link to heading
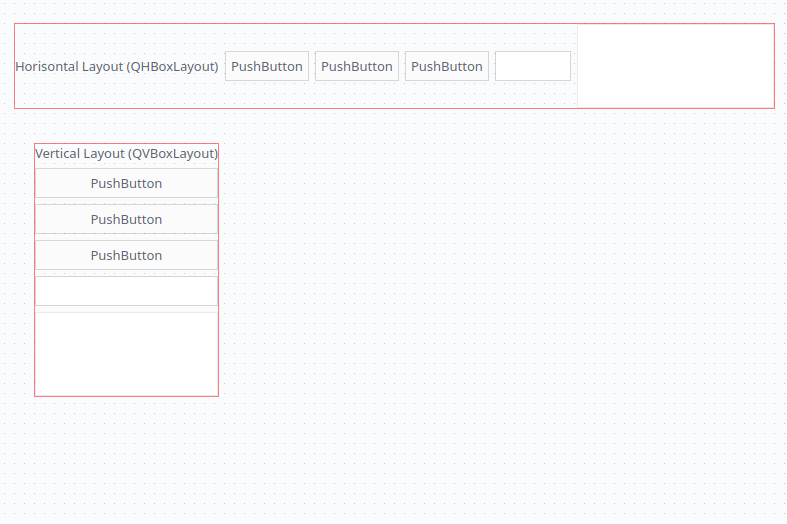
So, instead of that we use layouts, that are like containers that automatically arrange and resize widgets based on simple rules.
The most basic ones are horizontal and vertical layouts:
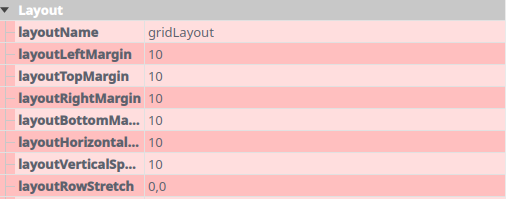
And the one we will use is grid layout:
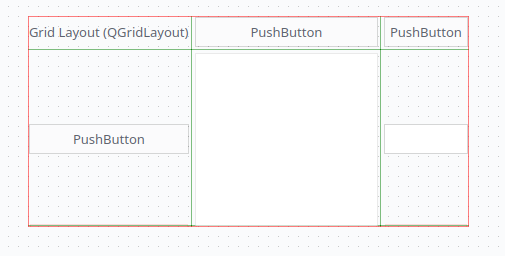
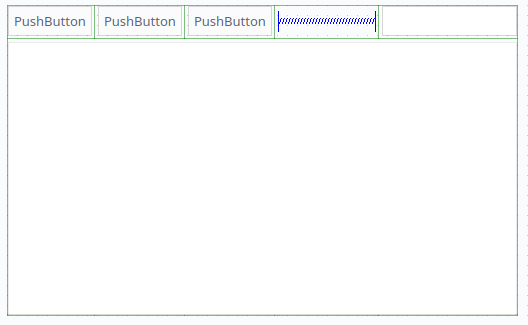
So we place our widgets on grid how we want…

And see that it doesn’t look quite like text editor yet. To fix this, we hold left mouse button on sides of text edit widget, and resize it several times to make it take all width of our layout.
And also you can add a horizontal spacer widget to separate buttons and search bar.
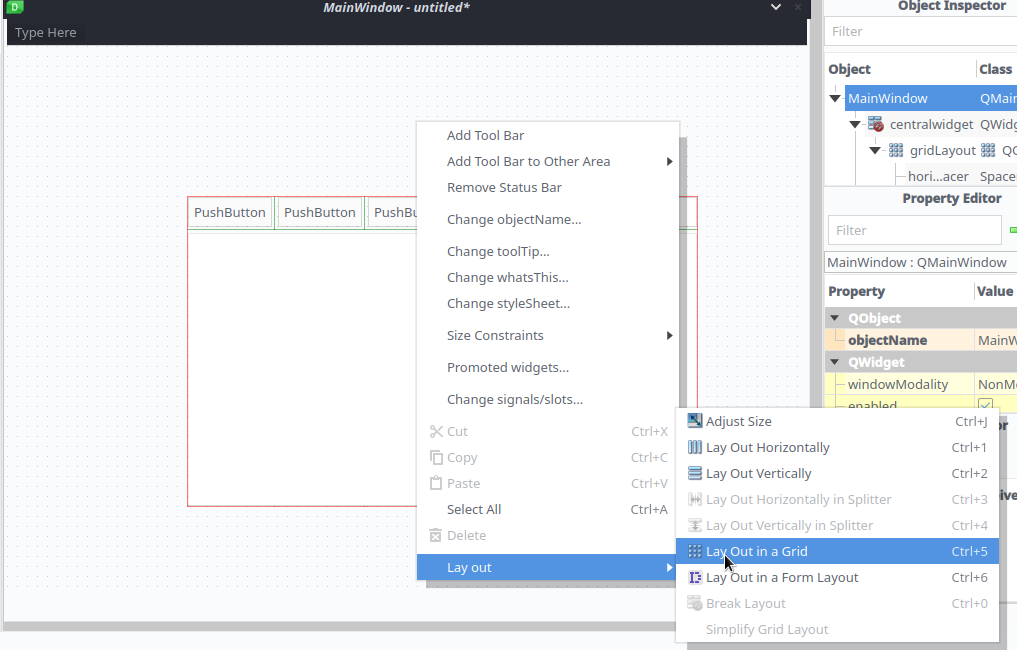
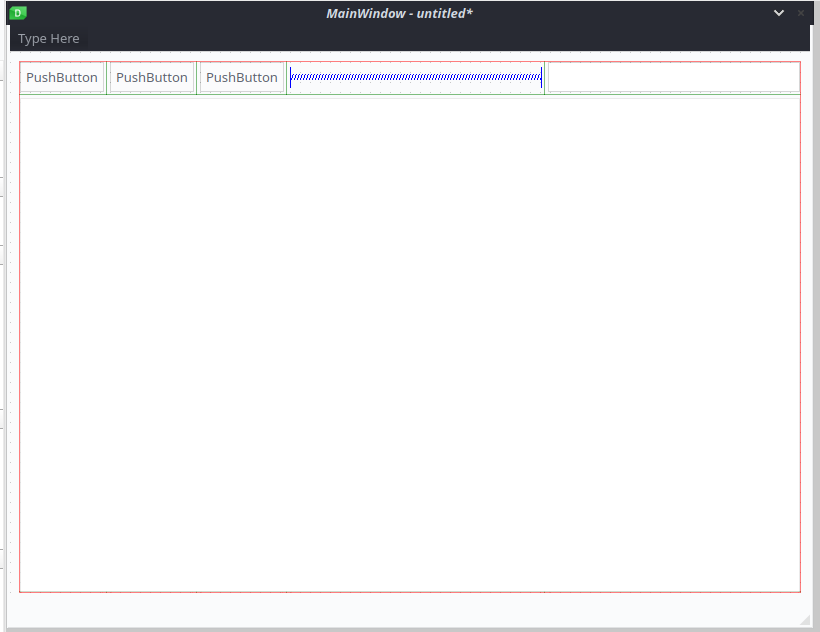
Then we press right button outside of layout, and choose Lay out in context menu, selecting any of layouts mentioned above to transform the window itself into a layout.
Customizing widget properties Link to heading
Changing text on a button is pretty easy, double click on it and input your text.
But we need a lot more than that, so we will select a widgets either directly or using Object inspector (2), then go to object properties (3) to edit ones we need.
| Name | ID in editor | Description |
|---|---|---|
| Object Name | objectName | Identifier of object used in code, so ensure it’s easy to understand |
| Text | text | Text on buttons and other objects. For text edit and line edit it will place preexisting “real” text, not the placeholder text you usually need. |
| Placeholder Text | placeholderText | Grayed out hint inside of line edit and text edit widgets |
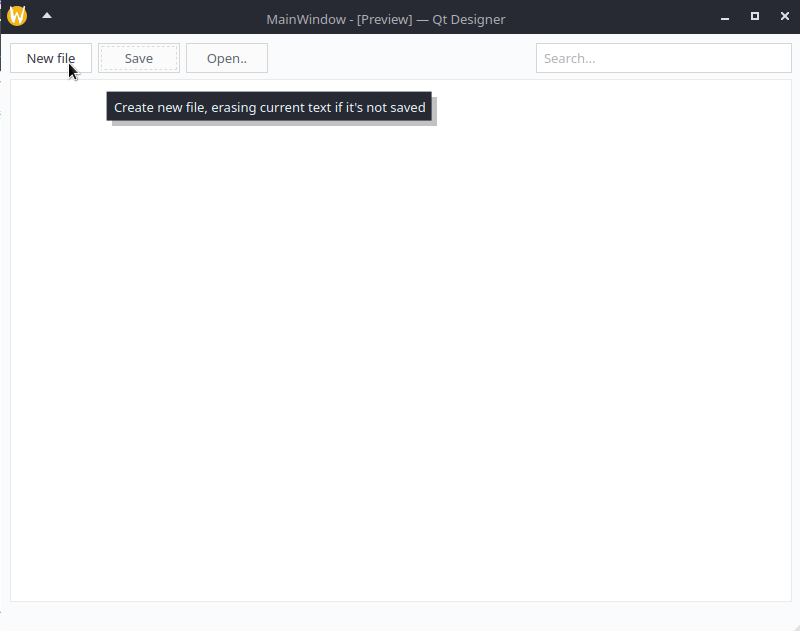
| Tooltip | toolTip | Text that shows up if you hover cursor over button, write a bigger description here |
Result will looks like this:
You should also add accessible name and description to widgets you added. This is a bare minimum of what you can do to ensure your software is accessible to more users.
| Acessible Name | acessibleName | Name of object that screen reader software reads to vision impaired users |
| Acessible Description | acessibleDescription | Something like a tooltip for screen reader software users |
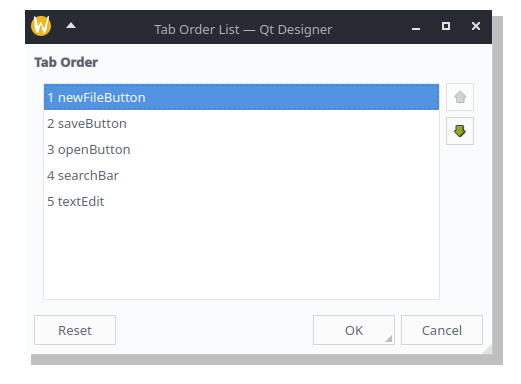
Tab order Link to heading
Correct tab order, on the other hand, allows to use Tab button to focus next (or previous, with Shift+Tab) interactive widget using only keyboard, which is also useful to screen reader users as well as other people who need to navigate your app from keyboard.
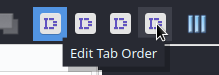
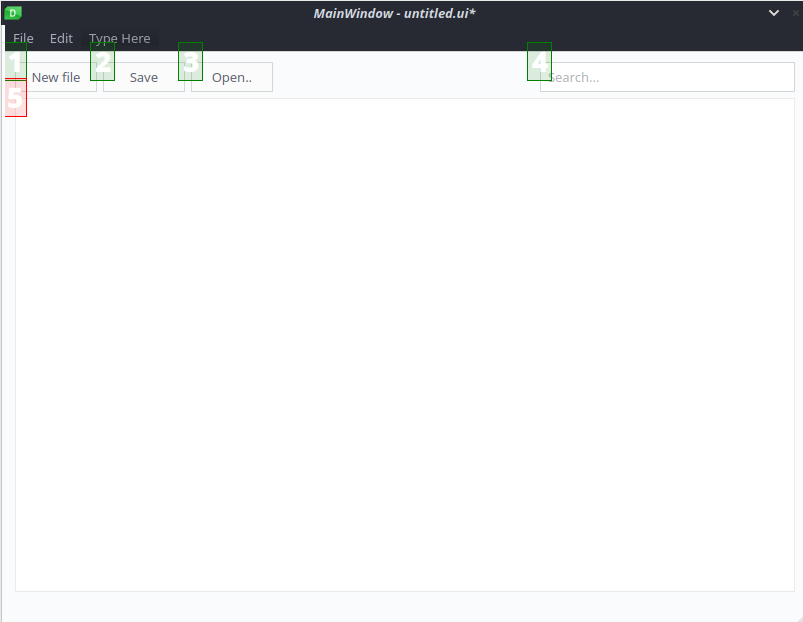
Select Edit Tab Order mode in button bar (6), and check if buttons are numbered in left to right, up to bottom order, if they are not, press on all of them in that order.
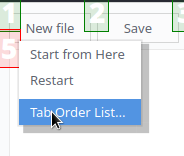
You can also use tab order list for the same purpose.
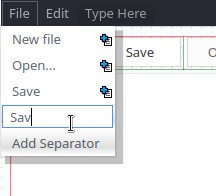
Setting up actions Link to heading
Next we will add actions, which are acting as both entries in menu bar and as actions you can add shortcuts to.
- Double click on
Type herein empty menu bar of your window, and type category name. - Press again and choose
Type hereinside dropdown menu, this time typing an action name. You can also add separators here. - Select new action and edit
shortcutentry in property editor, adding shortcuts
For our simple editor I recommend this list of shortcuts and actions
| Category > Name | Shortcut |
|---|---|
| File > New | Ctrl+N |
| File > Open… | Ctrl+O |
| File > Save | Ctrl+S |
| File > Save as… | Ctrl+Shift+S |
| File > Quit | Ctrl+Q |
| Edit > Search | Ctrl+F |
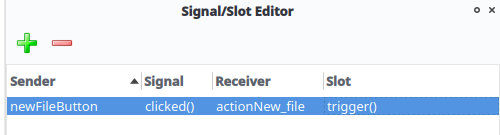
Signals Link to heading
At last, we should add signals. Signals allow us to connect different windows and/or actions to make that change of state of one affects the other. In our case, we want our buttons to be connected to respective actions, and our Search action to focus our Search Bar.
We could use a button from button bar (2) to enter signal editing mode, but it does not allow connecting actions, so we will use Signal Editor (4) to add new signal and select:
- Button by objectName as Sender
clicked()as Signal- Action by objectName as Receiver
trigger()as Slot
For Search action we need to use triggered() and setFocus() instead
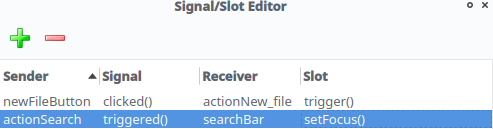
Do that for all buttons, and we are basically done with QT designer, with only thing left to do is to save the project as ui file and put it in project folder.
Connecting interface to PyQT5 code Link to heading
After finishing all of that, we will still need to put this interface into our app. We will use PyQT5, a Python language library for QT as an example.
Load interface from code Link to heading
So to load an interface we have a two different ways. One is to convert a ui file which we can save from QT Designer into python code, using uic command line tool or generating it from QT Designer itself.
pyuic5 interface_filename.ui > interface_filename.py
from PyQt5.QtWidgets import QMainWindow, QApplication
from interface_filename import Ui_MainWindow

class MainWindow(QMainWindow):

    def __init__(self):
        super().__init__() #initialize main

        # Load and apply interface to main window
        self.ui = Ui_MainWindow()
        self.ui.setupUi(self)

app = QApplication(sys.argv)
w = MainWindow()
w.show()
app.exec_()
The other one is to use uic as library and load a UI file directly, converting at runtime. Second methods adds slight overhead to your application and requires shipping ui file with it, but allows you to quickly test changes to .ui file just by rerunning the code.
from PyQt5.QtWidgets import QMainWindow, QApplication
from PyQt5 import uic

class MainWindow(QMainWindow):

    def __init__(self):
        super().__init__() #initialize main

        # Load .ui file from path and apply to main window
        uic.loadUi("interface_filename.ui",self)

app = QApplication(sys.argv)
w = MainWindow()
w.show()
app.exec_()
There are two differences between two that affect our project:
- In first method, objects are called as
self.ui.objectNamesince we imported them as object calledui, while in second method we use justself.objectName - If you use second method, it weirdly ignores central widgets’ margin settings, which makes it have no space between buttons and edges of window, so we need our manually added grid layout to have margin instead, using Property Editor (3) (You can also set margin properties to 0 in central widget so there is no discrepancy between how your interface is imported)
Connect to functions Link to heading
After we do that, we need to add some functions that make our interface actually function. Here I will not go into details about how these functions work, since this is mostly a qt designer video, so our focus is to connect them to our widgets afterwards.
QT designer did some work for us, allowing us to simply call widgets from code just as their names (in case of Python, self.objectName for uic library method, or self.ui.objectName if we used first method), so we add code that connects action triggered signals to functions in __init__ of our MainWindow object.
self.ui.actionNew_file.triggered.connect(self.create_new_file)
# or
self.actionNew_file.triggered.connect(self.create_new_file)
For buttons we would use clicked instead of triggered, but we already connected them with signals so it’s not needed
The exception here is search field, we use returnPressed to trigger searching function.
self.ui.searchBar.returnPressed.connect(self.search_text)
#or
self.searchBar.returnPressed.connect(self.search_text)
Conclusion Link to heading
You can find full project files here - https://codeberg.org/system-maid/cute-writer
I may also make a follow-up tutorial for more complex interfaces, or PyQT5 code, but for now, goodbye, I hope to see you again later.